Create Account Groups
Groups are user-defined characteristics that can
be assigned to similar accounts. Assigning groups to accounts lets you
easily track and sort accounts with common characteristics on your Net
Worth Summary and Net Worth
Details pages. Groups are particularly useful if you have many accounts
and want a way to organize them. You can create and assign groups
to any of your accounts. Up to two groups can be assigned
to each account; these groups are mutually exclusive.
Note: While
consolidations are useful
for reporting purposes and to view a subset of information across accounts,
groups are useful to group accounts with similar characteristics within
consolidations.
For example, you may have a consolidation of all
your family accounts. Within this consolidation, you want to organize
the accounts by Northern Trust versus non-Northern Trust accounts, and
also by each of your children's names. So for one account, you may
choose to name group 1 "Northern Trust" and group 2 "John."
For a second account, you may choose to name group 1 "Northern
Trust" and group 2 "Sarah." For a third account, you may
choose to name group 1 "Non-Northern Trust" and group 2 "John."
And for a fourth account, you may choose to name group 1 "Non-Northern
Trust" and group 2 "Sarah."
Then, within the Net Worth Summary and Net Worth
Details pages, you can choose how many groups (zero, one or two) to view,
as well as how to group the
groups (group 1, then group 2, or vice versa). In the example
above, you may choose to view your accounts grouped by Northern Trust
versus non-Northern Trust accounts, and then by your children's name;
or you may choose to view them by your children's name and then by Northern
Trust versus non-Northern Trust Accounts. Below are ways you may
choose to organize your accounts within your "family accounts"
consolidation in this example:
Northern Trust
->
John
<Account>
->
Sarah
<Account>
non-Northern Trust
->
John
<Account>
->
Sarah
<Account> |
OR |
John
->
Northern Trust
<Account>
->
non-Northern Trust
<Account>
Sarah
->
Northern Trust
<Account>
->
non-Northern Trust
<Account> |
Create and Assign an Group to an Account
Go to Settings
-> Manage Accounts. All the accounts are displayed in a
list in the Accounts tab.
Select the checkbox next to one or more
accounts that you want to edit, and click Edit
Selected Accounts. The Batch Edit Accounts page is displayed.
Click Add
under the Group 1 field. The
Account Groups - Add Group(s) page is displayed.
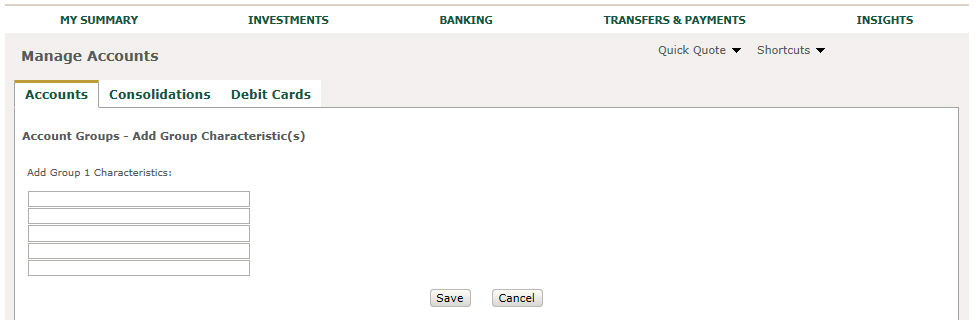
Enter up to five groups for the drop-down
list for Group 1, and click Save.
The Batch Edit Accounts page is displayed.
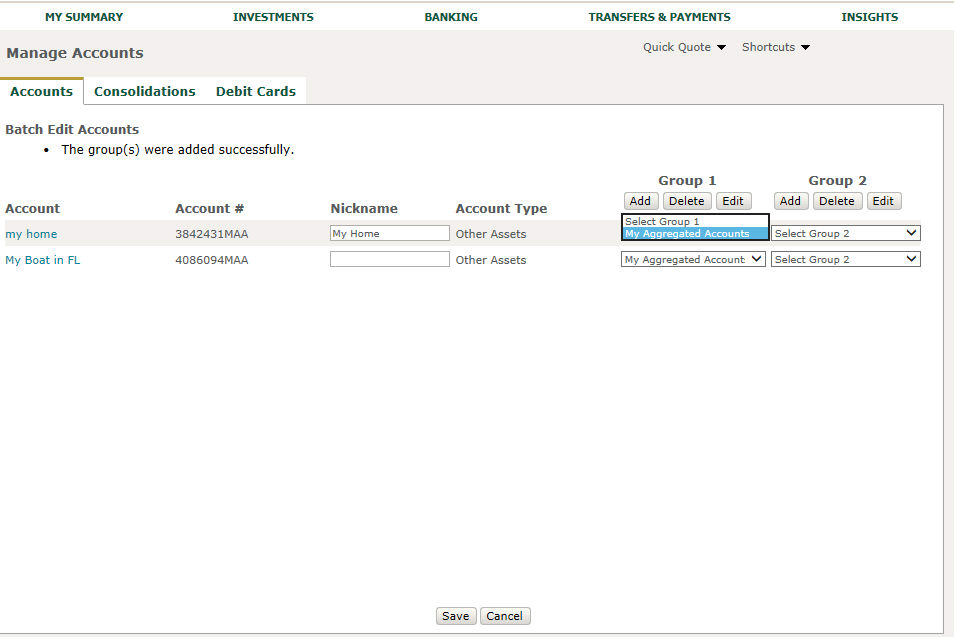
Select a group in the Group
1 drop-down list next to the account for which you want to
assign a group.
Repeat steps 3-5 to create group values
for the Group 2 field.
Click Save.
The Account List page is displayed. The group(s) you added
will be displayed under the Group 1 and/or Group 2 fields, available
to be selected for any account(s).
Edit a Group
Go to Settings->
Manage Accounts. All the accounts are displayed in a list in
the Accounts tab.
Select the checkbox next to one or more
accounts that you want to edit, and click Edit.
The Batch Edit Accounts page is displayed.
Click Edit
under the Group 1 field. The
Account Groups - Edit Group Characteristic(s) page is displayed.
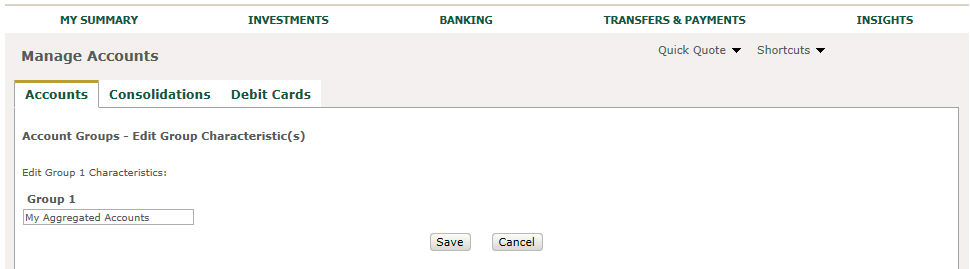
Rename any of the group values and/or use
the up/down arrows to move a value up or down within the drop-down
list, and click Save. The
Batch Edit Accounts page is displayed. The group values are
renamed and/or listed in the new order.
Repeat steps 3-4 to edit Group values for
the Group 2 field.
Delete a Group
Go to Settings
-> Manage Accounts. All the accounts are displayed in a
list in the Accounts tab.
Select the checkbox next to one or more
accounts that you want to edit, and click Edit.
The Batch Edit Accounts page is displayed.
Click Delete
under the Group 1 field. The
Account Group - Delete Group(s) page is displayed.
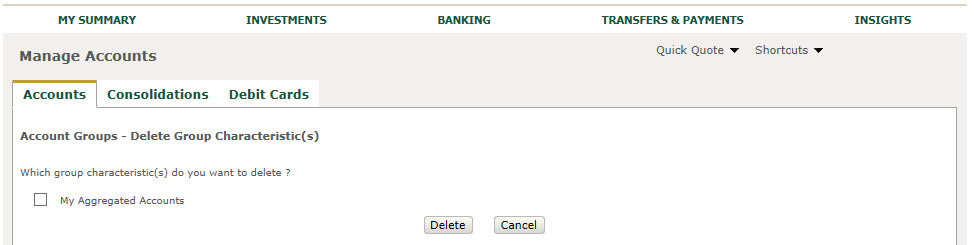
Select the checkbox next to each group value
you want to delete for Group 1, and click Delete.
A delete confirmation page is displayed.
Click Delete.
The Batch Edit Accounts page is displayed. The deleted
values are no longer visible in the Group
1 drop-down list.
Note:
If any of your accounts were assigned the group value that was deleted,
the value will default to 'Select Group 1' in the drop-down list. Within
the Net Worth Summary and Net Worth Details, it will default to the value
of 'Unassigned' unless a new value is selected.
Repeat steps 3-5 to delete group values
for the Group 2 field.
Related FAQs
How do I find more detail for
an account?
Where are account nicknames used?
Related Topics
